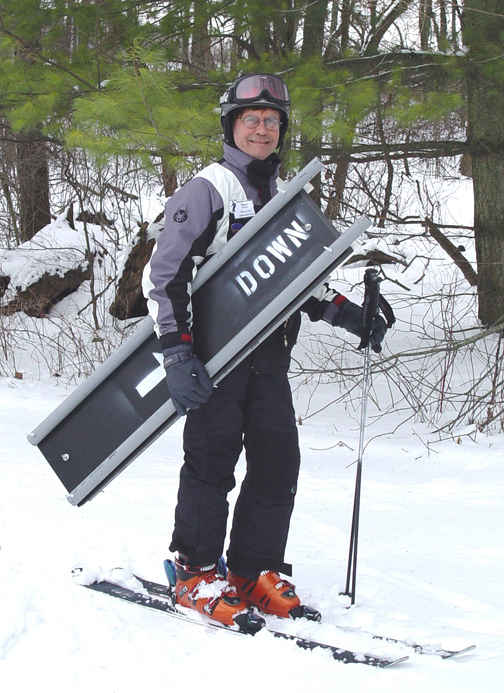
Figure 1
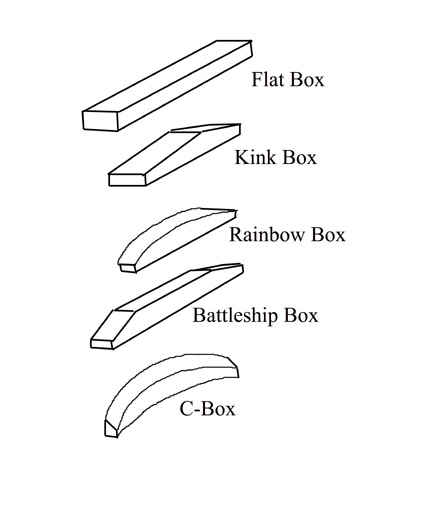
Figure 2
The progressions and movement analyses presented in this article are geared toward riding a flat, straight box (top of Figure 2), the easiest to master. Similar progressions for riding on the other boxes may serve as material for future articles. It is recommended that students wear helmets during terrain park lessons. In Figure 3, the 8 ft. box training aid is placed upon the snow in the ski school practice area, aligned down the fall line. This is an important consideration since a box that is not down the fall line will encourage skiers to ride off one side before making it to the end of the feature. The training aid should be relatively level from side to side, since a tilted surface will also cause the skier to slide off to one side. The 50/50 slide or straight run over the box is the first and easiest maneuver to try. The term 50/50 comes from snowboarding where 50% of the snowboard hangs over the right side of a rail while 50 percent of the board hangs over the left side of a rail. When demonstrating to the students, approach the feature with a wedge to adjust speed to that which is comfortable for a first run (Figure 3). Mount the feature with ankle, knee and hip flexion to adjust for the frictional difference between the snow and the box surface material (Figure 3, frame 2). Most fun boxes have a polymer or plastic surface that tends to simulate snow but often is slightly different. If the friction of the fun box surface is higher than that of the snow, then a slight leaning back posture may be required to resist the added drag on the skis. If the fun box riding surface is slicker than that of the snow, a little forward lean may be required to keep from falling back.

Figure 3
Look down the long axis of the box and hold the straight run position with skis about shoulder width apart and parallel. Avoid any edging or steering to correct a bad line on the box since the box surface is too stiff for the edge engagement needed to change direction. Flex the knees and ankles upon exit (Figure 3, frame 4) to practice landings on boxes that have a drop off at the end. Emphasize a good lineup because a bad line is difficult to correct and will probably lead to a fall. Figure 4 shows three frames of students performing a 50/50 slide on the portable fun box training aid and serves as examples for movement analysis. Figure 4, frame 1 shows a student with relatively good positioning comprising ankle and knee flexion with skis parallel and on the box running surface. Figure 4, frame 2 shows a student with a poor line up on the long axis of the box who is wedging slightly to steer a corrective path (which is not working.) Using the wedge to line up and adjust speed prior to entering the fun box is a primary skill that should be reviewed to avoid this problem. In Figure 4, frame 3, the student is trying to correct a bad line up and is trying to steer out of it with a wide wedge. Caution them to keep their skis about shoulder width apart, since a wide stance may result in straddling the box, a problem that snowboarders do not experience, that can be painful for skiers. If a student has approached with a line that is not coincident with the long axis of the box, encourage him to ride off a side and try again.

Figure 4
When students feel ready, put away the teaching aid and review terrain park etiquette; check out the features first; call out before you hit a feature; avoid blocking the path of other riders. When checking out the park, keep the class to the side as most parks are pretty busy. Show the students how to check out a feature. Is it down the fall line? Is it tilted to one side? Is the landing symmetrical? If the landing area carved out by other riders appears to be to one side, then the box may be tilted or not down the fall line. If the box is tilted or off the fall line, suggest that the students try another box. Choose an easy straight box that is well positioned since a tilted or off fall line box will affect slower riders more than the faster ones. Taking it slow for the first run is less challenging so you want to set it up for success by selecting a well situated box. A box with a continuous entry snow ramp is preferable as the student does not have to negotiate a gap to get on the box. Figure 5 shows such a box for the first 50/50 slide in the terrain park. Approach with a wedge to adjust speed and ride up the entry ramp, looking at the end of the feature for proper line up. Ride onto the box with skis parallel at shoulder width, adjusting fore and aft position according to the degree of drag on the box. On very cold days with little box usage, some of the box surfaces will exhibit more drag than the snow, so lean back slightly. On days with temperatures above freezing with liquid water on the box surface, slight forward lean may be required as the box will probably be slick. Since this box has a drop off at the end, flex a little to help absorb the landing.
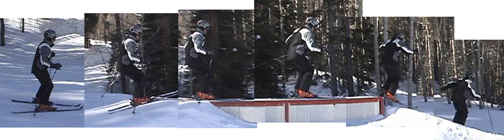
Figure 5
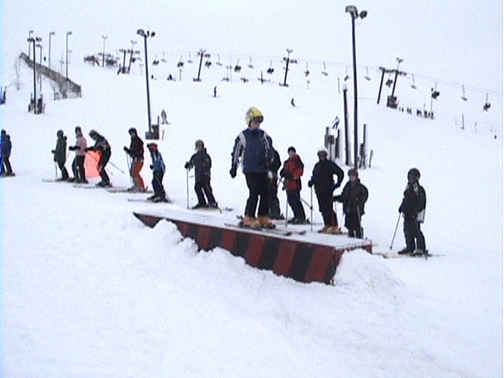
Figure 6
Figure 6 shows a class getting ready for a first pass in the park with one of the students achieving a good first try at a 50/50 on a straight box.

Figure 7
Congratulations, your class has performed their first terrain park maneuver on a box. The next maneuver to try is what is called the board slide (essentially a side slip on a box). If possible return to the portable feature to try out the board slide before attempting it in the terrain park. The 45 degree board slide is the best to start out with as it is easier to perform than the full or 90 degree board slide. In the 50/50, the skis are parallel to the long axis of the box or zero degrees. A board slide has the skis at some other angle to the direction of the long axis of the box, ie, 45 degree slide means the skis are side slipping at a 45 degree angle to the long axis of the box. Approach with a wedge to adjust speed (Figure 7, frame 1) and ride up the entry with flexion (Figure 7, frame 2). Hop onto the box surface simultaneously rotating the lower body to place the skis in a 45 degree side slide and counter rotate the upper body to stop the lower body rotation at 45 degrees. The hop must be emphasized since steering into the 45 degree board slide will usually not work. Slide with feet shoulder width apart and skis flat. Edging does not increase friction because of the hard surface and often results in a fall. The center of mass should be between the feet. Eliminate the countered upper body at the end, which will straighten the skis, and ride off the end like the 50/50. For the 90 degree board slide, the position shown in Figure 8 is achieved with a little more lower body rotation and upper body counter rotation.
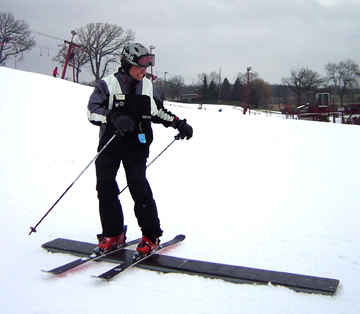
Figure 8
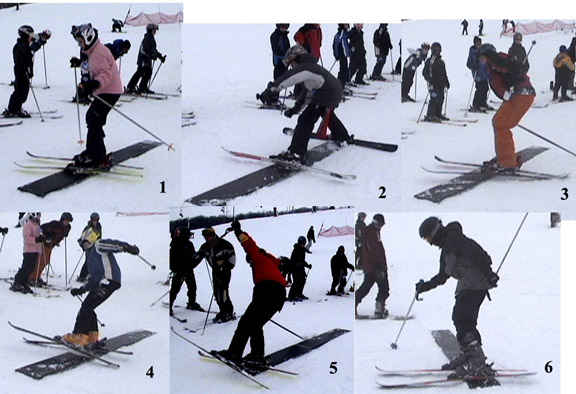
Figure 9
Figure 9 shows examples of student positions for movement analysis. The skier in the pink parka in Frame 1 has a reasonably good 45 degree board slide position with counter rotated upper body, parallel skis and motion along the long axis of the feature. The student in Figure 9, frame 2, has steered onto the feature rather than hopped onto the feature, causing the trailing edge to engage at the entry of the box. Emphasize a hop to the board slide position. The skier in Frame 3 has mounted the feature slightly off center such that the boots and center of mass are at the edge of the feature rather than centered. One can see the tails of the skis dragging and an attempt to stay on the feature with excessive hip flexion. Emphasize a good line up and perform some static positioning exercises on the feature. Frames 4 and 5 of Figure 9 show a classic loss of balance with excessive edging during a board slide. As skiers, we are used to edging in a side slip to control speed. As we edge on snow we often lean away from the direction of travel as the ski edges engage the snow. When performing a board slide on a box feature, leaning away from the direction of travel plus edging is ineffective and typically results in loss of balance and a fall as the center of mass moves outside the line between the feet. Emphasize board sliding on flat skis, shoulder width apart, utilizing a static positioning exercise on the feature. Frame 6 of Figure 9 shows reasonably good positioning for the 90 degree slide, although the lack of upper body counter rotation will make it difficult to hop back to the straight run position so the student may exit the feature in a side slide. Arm positions tend to vary depending on the degree of rotation desired by students. Avoid excessive critiquing of arm and hand positioning and focus on what is happening at the lower and upper body when performing movement analysis.
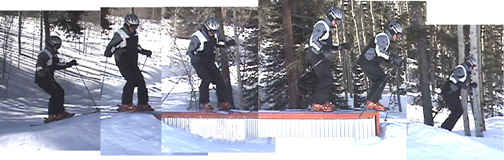
Figure 10

Figure 11

Figure 12

Figure 13
When the students are ready with their twin tip skis and helmet, head to the park and, preferably, use the same feature used previously in the park. Give it a try as shown in Figure 13 (sequence right to left). Wedge up the entry ramp to control speed and hop onto the feature with rotation, landing at approximately the 90 degree board slide position. Continue the spin to 180 degrees, landing switch at the exit end of the feature. This is a relatively advanced move on the fun box and may be limited to your best students in the class. Encourage your students to try some of these moves on the fun box, but only if they feel ready. As the class progresses, leave the students the option to practice whatever maneuver they feel comfortable with. It is not unusual to end a class with some students performing 50/50’s, some performing the board slide at varying angles and some performing 180 or 360 degree flat spins. The usage of training aids or easy boxes in the training area cannot be underestimated. Training aids give you control of the class and terrain. You can perform movement analysis, and static and dynamic position exercises without interrupting the flow of the terrain park. We have had positive feedback from students using terrain park aids. They say it’s easier and helps them get a feel for an actual feature. Set up your students for success by following a systematic progression from the easy to the difficult, in steps that can be taken easily, a tenant long advocated by PSIA.
Chuck Roberts teaches snowboarding and skiing at Wisconsin’s Wilmot Mountain. As an AASI Level II instructor, he’s been teaching snowboarding since 1987. Also a PSIA Level III alpine ski instructor, he’s been teaching skiing since 1970. He works as a consulting engineer.
 BACK TO ROBERTS SKI AND SNOWBOARD INSTRUCTION HOME PAGE