
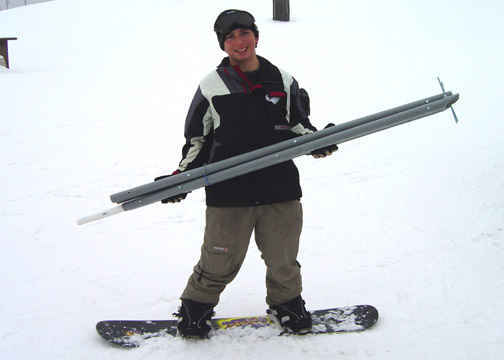
Photo 1_______________________________________________Photo 2
The Setup
A portable fun box weighs in at around 29 pounds (photo 1), and the portable rail feature (photo 2) typically weighs 12 pounds and are both approximately 8 feet long when assembled. The fun boxes and rails we use at Wilmot Mountain use PVC pipe in their construction (the fun box uses it for support under a flat upper surface made of a sheet of expanded PVC flat stock) and they are easily disassembled for rapid transport. Once placed on the snow, the portable features are held in place by snow anchors, small bolts extending below the portable feature that grip the snow surface and prevent movement of the device while riders are on top (see sidebar). Before setting up the features, though, you need to choose an optimum locale for teaching terrain feature drills. Mild slope angles can help limit the rider’s speed and allow him or her to focus on positioning and lining up with the features. Therefore, try to set up features on the fall line of a 3- to10-degree slope out of heavy traffic lanes and with the long axis of each feature pointing directly down the fall line. A good location for this is on a quiet “green” run or at the base of the area, away from the ski lift lines. If students tend to slide off one side more than the other, it’s a good bet that the feature is not on the fall line, and you’ll need to adjust the fun box or rail. Although the entry ends of both features are tapered, it can be helpful to pile a little snow at the uphill, or entry, end of the feature as well. While you as instructor are in charge of the portable features, you can encourage students to bring a few things along to the temporary terrain park: wrist guards, shin and knee pads, impact shorts, and helmets all can help protect against the bumps and bruises that come with learning a new sport. The typical portable terrain park feature separates into two pieces and is designed to be carried on a lift in fundamentally the same way racing coaches transport slalom poles. When not in use, however, portable features are best stored in a shed near the base area. (In particular, make sure that portable features are stowed in a secure storage area when students decide to move on to the terrain park.) You’ll discover that one of the big advantages to portability comes when your students have mastered various moves on a relatively flat slope. If the student was on a slope of 3 degrees, a logical progression would be to move to a slope of 5 degrees to repeat the same moves on a steeper angle, and so on. Since the terrain feature is portable, all you need to do is pick it up and move to a slope that meets the challenge the student needs.
Getting Started
A portable feature can help students develop a balanced stance and line up properly with the feature in order to experience the feeling of sliding on an artificial fixture. Once you’ve demonstrated a 50/50 slide (one of the maneuvers riders will want to master early on), the challenge is now to help the students onto the features for the first time. When it comes to the actual approach, you can show riders how to line up and simply ride onto the feature. At this stage of the progression, jumping onto the feature is not recommended since it often results in the student’s weight being too far back. Later on, though, when students are used to the difference in friction between the feature and the snow and are ready to attempt a board slide, jumping onto the feature will be recommended. Both rails and fun boxes require a balanced stance and an ability to align the body with the long axis of the feature (photo 3). To help provide a sense of security, equilibrium, and alignment on the feature, you can hold the student’s hands to help him or her maintain proper stance in preparation for a 50/50 slide on the portable rail or fun box. (Keep in mind, however, that not all students will require or desire physical assistance, and it’s important to know when to step back and simply watch their progress.)
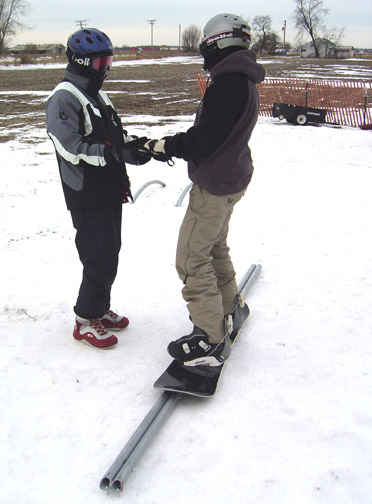
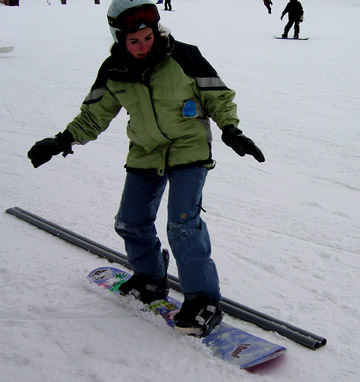
Photo 3_______________________________________________Photo 4
The best way for a prospective terrain park rider to start learning about movement is to ride onto a portable fun box because it’s distinctly wider than the rails. But the teaching progressions discussed in this article work equally well on both fun boxes and rails. You can facilitate mounting either feature by making sure there’s a small mound of snow at the uphill end of the box. Whether your student is working on a fun box or a rail, encourage him or her to make a first attempt with a quasi-static run (i.e., barely sliding, with or without assistance) across the surface of the feature. Next, ask the student to walk up a short distance above the feature and ride down to try a 50/50 without assistance and while adding a little speed (it doesn’t have to increase much considering that the previous run was performed at a near-standstill). A student’s first shot at riding a feature can result in a variety of outcomes. While some students might totally miss the feature on a first approach (photo 4), there’s nothing wrong with that outcome because they’re still getting practice in lining up parallel to the feature. In fact, students with a reasonably effective stance (i.e., hips aligned with the feet, and using slight ankle, knee, and hip flexion) can benefit a great deal from a trial parallel pass alongside the feature. On the approach, you can teach one effective way to boost the accuracy of the mount by asking riders to focus their eyes on the far end of the rail or fun box. Another helpful trick for improving lineup is to have riders hold out their downhill hand in alignment with the feature, looking in the direction he or she is pointing.
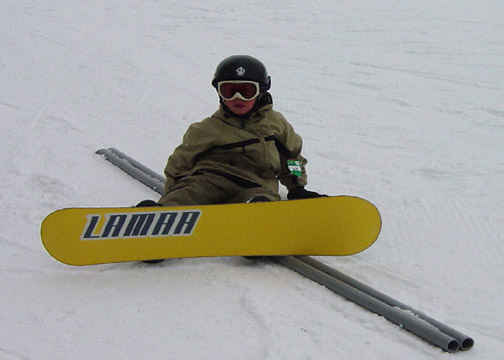
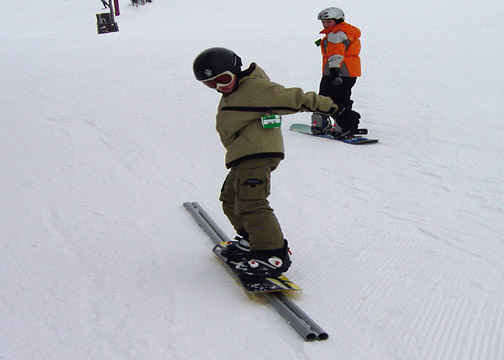
Photo 5_______________________________________________Photo 6
Once they’re on the feature, though, students will quickly learn that it’s difficult to correct a bad line and discover that such efforts usually prove unsuccessful since steering and edging can’t easily rectify an unsatisfactory entry and could even result in a fall. Although there are bound to be a few spills, their consequences are certainly minimized thanks to portable features. With practice, however, most intermediate level students soon learn to ride 50/50 along the entire length of the feature (photo 6). Both the rails and fun box maintain a low profile—resting just above the surface of the snow—to reduce the fear factor associated with standard features in a terrain park. By increasing riders’ chances for success, portable features can tend to boost rider awareness and enthusiasm at the same time.

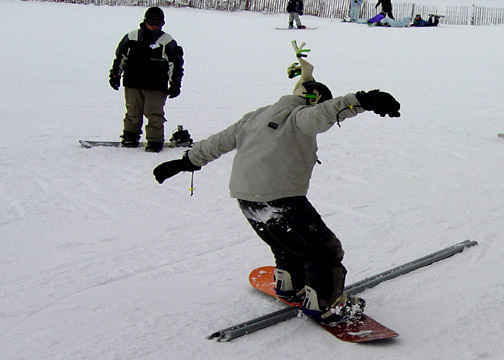
Photo 7_______________________________________________Photo 8
Checking the Angles
Before long students will want to try board slides on the portable features (photo 7), and once again loaning a helping hand or two will help riders quickly acclimate to these moves (photo 8). While assisting the students with board slides along a fun box or rails, ask them to try and get a feel for the board’s balance point between the feet. In advanced lessons, you can have students work on balance points under one foot or outside the feet while maintaining significant center of mass movement over the box or rail to maintain balance. In addition, stress the importance of keeping the knees over the toes through knee, hip, and ankle flexion. Demonstrate mounting the feature with a slight hop to a 45-degree angle to the feature. Unlike the 50/50 slide where you can ride up onto the feature, steering into a board slide without a hop doesn’t work well. The hop is necessary to avoid the discontinuity between the positive edging effect achieved on the snow and the complete lack of edging effect on the relatively hard surface of the feature, which interrupts the flow of the maneuver and can cause a fall. Next, allow the student to try the board slide unassisted with the board positioned at various angles to the box or rail, preferably in a slide first with the board at a 45-degree angle to the feature (photo 9). A 45-degree board slide can serve as an intermediate position between a 50/50 (i.e., riding parallel to the rails) to a pure board slide (a right angle, i.e., riding perpendicular to the rails). Remind the student to hop onto the feature, landing in the 45-degree board slide position, and once the rider has gained confidence at that angle encourage him or her to approach the feature with a slight toe side edge on the snow. The toe edge will act as a platform for the hop to the 90-degree position. Once your students feel confident in their skills, ask the class to circulate from the bottom of the portable feature to the top for another try. This will allow you to remain in one place, even temporarily, to perform movement analysis with each student to help him or her improve technique.

Photo 9_______________________________________________Photo 10
The Real Deal
Once students have done a few successful 50/50s on the portable feature, they will be ready for the easy fun box in the terrain park. When you and your students feel comfortable with the idea of visiting the park, go over park etiquette and safety rules (a good reference for such rules is NSAA’s “Smart Style” program) and then head over and have them check out the easiest fun box you can find. A small straight box (such as the one shown in photo 10) or a small, straight rail would be preferable for your riders’ first shot at the park. The question of when to take the students to the terrain park for a first shot is something that needs to be decided by the instructor. The decision to move to the real thing should be determined by criteria such as the busyness of the park and snow conditions. Some students do well in the park after about an hour of practice on portable terrain park features, but others will need more preparation. Since portable features can be used for practicing advanced maneuvers such as board slides, students who are comfortable with 50/50s can practice board slides while other students continue to work on the basic 50/50. If the majority of your students are ready, you can take the entire group to the park and have those students who feel confident ride while the others observe. Even though you’re sure that a student is ready for the terrain park, it is ultimately the student who needs to decide when to give stationary features a try. Encourage your student to try out the terrain park only when he or she is comfortable doing so. When he or she is ready, be sure to put the portable feature away in a safe location before heading to the terrain park. Go over park etiquette and safety rules before students enter the park. Once inside the park, pick out a feature to use that’s about a foot high. This isn’t as easy as it sounds since many fun boxes have a minimum height of around 18 inches. If possible, use a straight box rather than a rail for your students’ first feature. Once your riders are ready, short flat rails 6 to10 inches above the snow can serve as a good first rail ride. Because it’s unlikely that you and your students will have the terrain park to yourselves, you will not have the kind of control over the feature that you had with the portable versions. Try to keep students from obstructing traffic, but do your best to give them time to try out the feature at his or her own pace. Have riders keep to the side of the trail as much as possible while still making sure that they’re in a position to observe other students taking their runs. By asking them to stay out of the way and maintain a keen awareness of others, you’re helping students prepare for the day when they decide to enter a park on their own.
Conclusion
Portable terrain features are excellent teaching tools for prepping beginning terrain park riders for rails and fun boxes. Although some parks offer small features for learning, portable features can be a good alternative because they allow the instructor to teach terrain park basics in a controlled, safe, and relatively quiet locale. And because portable features are practically flush with the snow, they can dispel much of the intimidation beginning terrain students might experience on a standard feature in a park. In addition to these advantages, the enthusiasm your students will experience on portable features will be contagious.
Chuck Roberts teaches snowboarding and skiing at Wisconsin’s Wilmot Mountain. As an AASI Level II instructor, he’s been teaching snowboarding since 1987. Also a PSIA Level III alpine ski instructor, he’s been teaching skiing since 1970. To pay for it all, he works as a consulting engineer.
SIDE BAR
How to Get Portable Terrain Park Features
As this article goes to publication, no manufacturers are currently making portable terrain park features. If demand for them increases, some manufacturers may step up and start producing portable terrain park features for ski schools. In the meantime simplified drawings of the features are shown below (Figure 1). The portable fun box is essentially two pieces of ½ inch expanded PVC cut into two 1 foot by 4 foot lengths. They are mounted on two “pontoons” of 1.25 ID PVC pipe using ¼ inch by 5 inch bolts. The bolts hold the PVC pipe to the top surface and extend down to grip the snow (snow anchors). A 1.25 inch outside diameter tube is used to join the two pieces together. Snow anchors are not necessary on artificial snow surfaces such as Powderpak. Figure 2 shows an underside view of the portable feature. The snow anchors are the ¼ inch bolts.

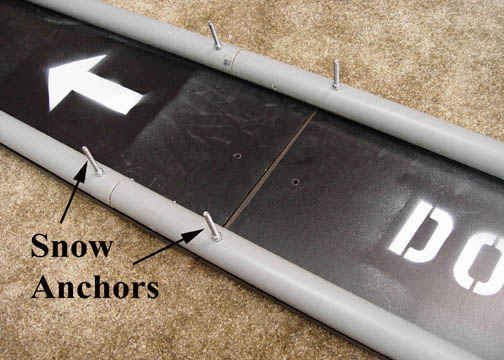
Figure 1_______________________________________________Figure 2
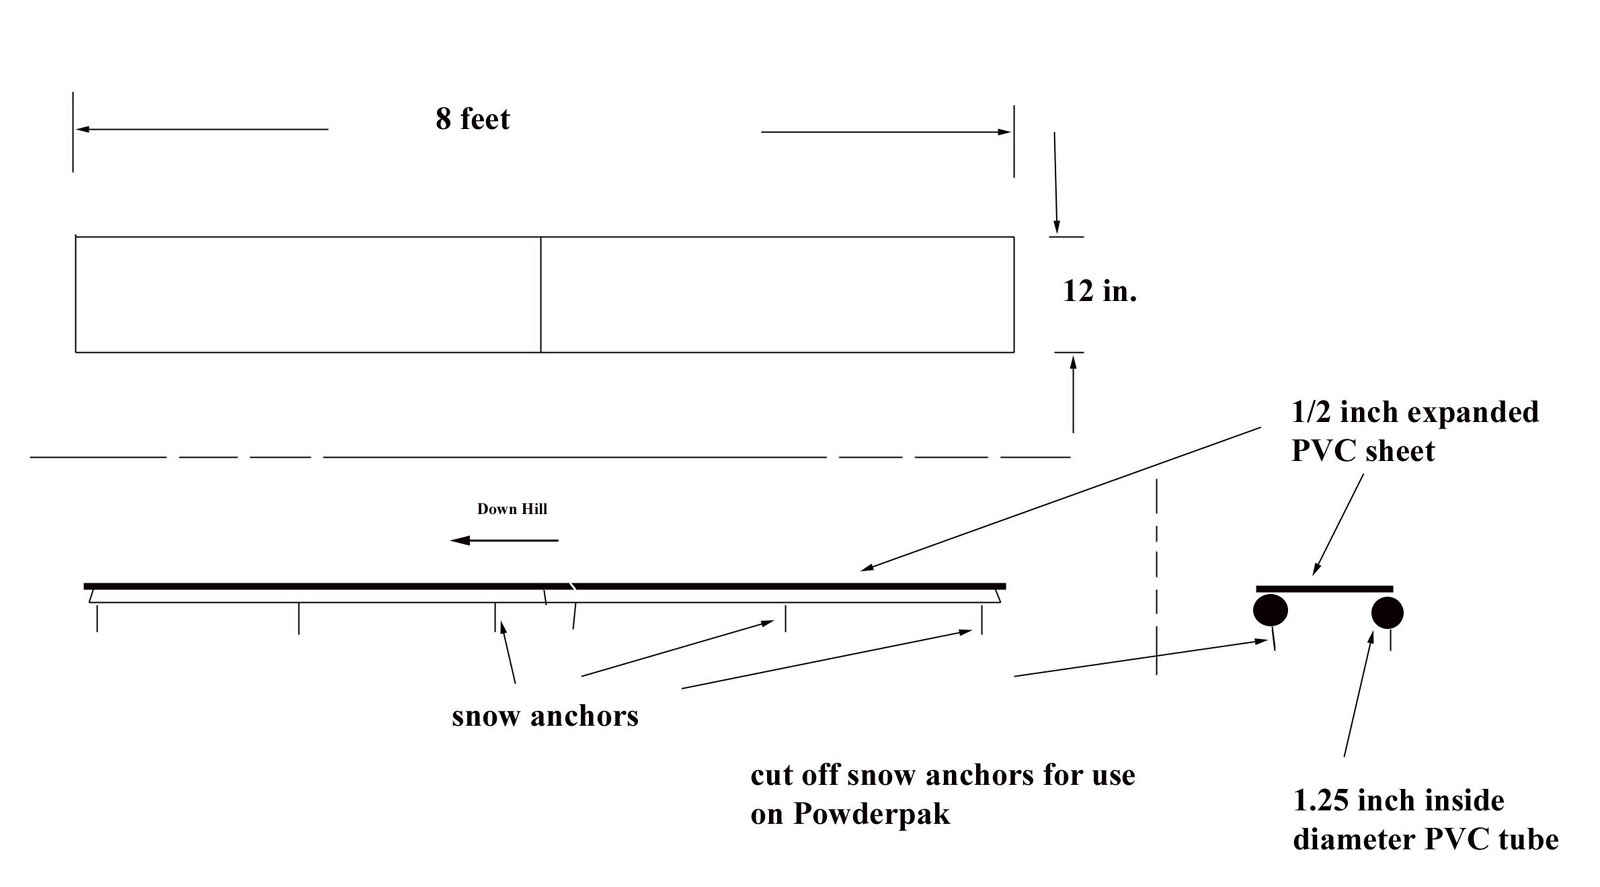
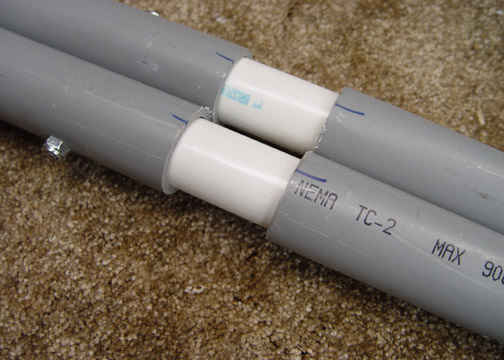
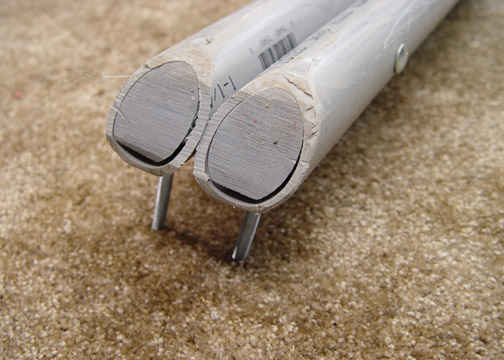
Figure 3___________________________________________________Figure 4____________Figure 5
 BACK TO ROBERTS SKI AND SNOWBOARD INSTRUCTION HOME PAGE